Mango Mousse Cake
It's going to be Father's day on this Sunday. Too bad I'm working on every Sunday :( There is no time to bake so I started baking this cake on Thursday night and garnish it on Friday! I actually got this mango mousse cake recipe from a friend two years ago. That was the time when she started baking yummy cakes and breads. One time she had us try her mango mousse cake and I immediately fell in love with her cake! I asked for the recipe right away but then it seemed too complex for me to do so it has been sitting in my mailbox for the past two years. Now my baking mode is on and mango is in season, so guess what? Mango mousse cake, here I'm gonna bake you!
Instead of following the original recipe exactly to the T, I used cake mix for my cake base. It's so much easier and simple to do and there is no oil/butter on the cake. The only fat coming out from this cake is from the mousse only.
Mango Mousse Cake
(12 servings ~ 285 calories each)
adapted from here
Ingredients:
For cake (makes two 8-inch cake, I only used one 8-inch cake for this recipe and used the rest for petite size desserts later)
1 box Betty Crocker's SuperMoist white cake mix
3 egg whites
1/3 cup unsweetened applesauce
1/3 cup non-fat sour cream
1 cup water
For Mango Mousse:
17g Gelatin Powder
60g Hot Water
350g Whipping Cream
3 Tbsp Icing Sugar
300g Mango Puree (if refrigerated, bring to room temperature)
1Tbsp Rum
200g to 220g Cubed Mango
For Mango Puree Topping:
150g mango puree (bring to room temperature)
1 Tbsp gelatin
4-1/2 Tbsp boiling water
60g Hot Water
350g Whipping Cream
3 Tbsp Icing Sugar
300g Mango Puree (if refrigerated, bring to room temperature)
1Tbsp Rum
200g to 220g Cubed Mango
For Mango Puree Topping:
150g mango puree (bring to room temperature)
1 Tbsp gelatin
4-1/2 Tbsp boiling water
Directions:
1) Preheat oven to 325F. Grease one 8-inch baking pans with cooking spray, set aside. (you may use the leftover batter for another cake or cupcakes)
2) In a large mixing bowl, beat together cake mix, water, egg whites, applesauce and sour cream in slow speed for 30 seconds then switch to medium speed for 2 minutes.
3) Pour batter into the baking pan(s).
4) Bake for 29-35 minutes, use a toothpick to check cake, if it comes out clean, it's done.
5) Let cool for 10 minutes then remove from pan. Let the cake cool completely prior to frosting with mousse (I left mine in the fridge overnight). Cut the cake in half horizontally and set aside.
 |
| Trying to be creative by using cans to make mini cakes |
 7) In a small bowl, dissolve gelatin powder in hot water. When the gelatin powder is fully dissolved, add to mango puree. Add rum to the mixture. Mix well.
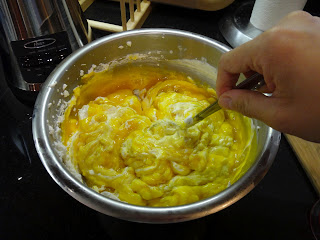
8) Add the mango mixture to whipped cream. Mix well till incorporated.
 9) Use a 8.5 inch cake ring, place a layer of cake and pour in mango mousse, or use a large piping tip to pipe the mixture. Add mango cubes and cover them with some mousse. Let it slightly set for about 10 minutes in the fridge.
10) Lay another cake layer and pour the remaining mousse. Let it set for 30 to 45 minutes in the fridge.

11) Meanwhile, dissolve gelatin in hot water for mango puree topping. Mix in mango puree. Wait till the mousse is set and the topping is cooled, arrange sliced fruits, if using, pour in the topping carefully. Let the cake chill for at least 3 hours before removing the cake ring. Note: I should have put the topping first before decorating with fruits, my cake topping looks uneven :(
 |
| Closer view of the mango flowers |
 |
| A slice of cake, it's very moist! |
 |
| My creative way of using cans to make cake rings |
 |
| It was a little struggle to get the cake out but the end result was good :) |
 |
| More left over cakes for personal size dessert |


No comments:
Post a Comment